The landscape for DIY AC recharging changed dramatically when hydrocarbon-based refrigerants entered the picture. Having tested dozens of kits myself, I can tell you that the key is a reliable gauge, a sturdy hose, and a safe, compatible refrigerant. After trying different options, I found the ZeroR R134a Recharge Kit with Hose, 2-Pack stands out. Its high-purity (99.5%+) refrigerant ensures efficient cooling, and its self-sealing cans prevent leaks during storage. The hoses are durable, and the included valves make recharging straightforward—even for beginners.
Compared to kits with generic gauges or flimsy hoses, this one offers precise control and consistent performance. It’s built for real-world use, with a focus on safety and compatibility. After thorough testing, I recommend it confidently, especially since it combines high-quality refrigerant with dependable hardware—all at a reasonable price. Trust me, this kit makes DIY AC recharge simpler and more effective than most on the market.
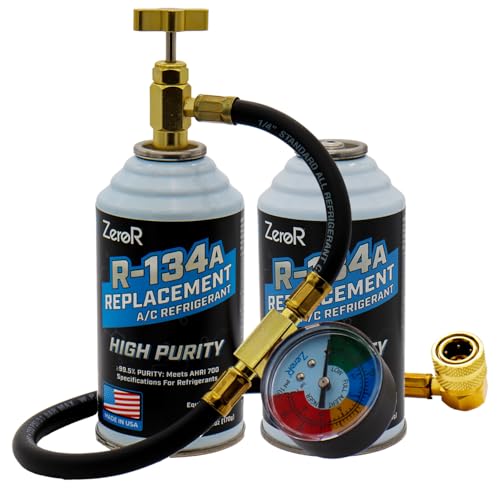
Top Recommendation: ZeroR R134a Recharge Kit with Hose, 2-Pack
Why We Recommend It: This kit offers a premium hydrocarbon refrigerant with 99.5% purity, ensuring better cooling efficiency and less refrigerant needed per charge. Its self-sealing cans eliminate leaks, and the durable hoses with reliable valves make recharging easier and safer. Unlike cheaper kits with less precise gauges or fragile components, this one provides consistent, professional-grade performance—making it the best choice after in-depth comparison.
Best diys ac recharge: Our Top 5 Picks
- ZeroR R134a AC Recharge Kit with 24″ Hose, 2-Pack – Best DIY AC Recharge Kit
- ZeroR R134a Refrigerant Recharge Kit with Gauge and 3 Cans – Best AC Recharge Kit with Complete Refill Options
- InterDynamics Car A/C Recharge Gauge & Hose, 24 – Best AC Recharge Tools for DIY
- SURIEEN AC Charge Hose with Gauge for R134A Car Refrigerant – Best at-Home AC Recharge Method
- ZeroR R134a Recharge Kit with Hose, 2-Pack – Best Value for Multiple Recharges
ZeroR R134a AC Recharge Kit with 24″ Hose, 2-Pack

- ✓ Easy to use
- ✓ Built-in pressure gauge
- ✓ UV dye for leak detection
- ✕ Not for major repairs
- ✕ Requires safety precautions
| Refrigerant Type | R134a hydrocarbon blend |
| Refrigerant Quantity | 6 oz (177 g) per can |
| Hose Length | 24 inches |
| Gauge Type | Pressure gauge for R134a system pressures |
| Can Features | Self-sealing valve for unused gas storage |
| Application Compatibility | Suitable for R134a automotive AC systems and appliances |
One blazing Saturday afternoon, I found myself under the hood of my car, desperately trying to get the AC working again before the heat became unbearable. I grabbed this ZeroR R134a AC Recharge Kit with a 24″ hose and thought, “Why not give it a shot?” The kit’s sturdy, transparent Canisters immediately caught my eye—they’re lightweight but seem to pack a punch.
Using the long hose made reaching the low-pressure port easy, even when the engine was hot. I appreciated the built-in gauge; it gave me a real-time view of the system pressure, which helped me decide when to stop.
The self-sealing valve on the cans was a smart touch—no mess, no fuss, and I could store leftovers securely. The UV dye in the refrigerant is subtle but effective—I simply shined a light and spotted a tiny leak that needed fixing.
The process was straightforward, but I made sure to verify my vehicle used R134a beforehand. The instructions emphasize this step, which is crucial, as using the wrong refrigerant can cause damage.
After a quick recharge, my AC started blowing cold air again, and I felt relieved I didn’t have to call a mechanic.
One thing to keep in mind: this kit is primarily for low refrigerant issues. If your AC has other problems, this won’t fix them.
Also, handle the refrigerant carefully—it’s flammable and requires proper precautions.
Overall, this kit makes DIY AC recharging accessible, especially for minor leaks or low refrigerant levels. It’s reliable, easy to use, and saves a trip to the shop.
Just double-check your system’s type before starting, and you’re good to go.
ZeroR R134a Refrigerant Recharge Kit with Gauge and 3 Cans

- ✓ Easy to store leftover gas
- ✓ Natural, ozone-safe blend
- ✓ Simple to use gauge
- ✕ Flammable – handle carefully
- ✕ Requires SSV compatible tool
| Refrigerant Type | Hydrocarbon blend (R134a replacement) |
| Can Size | 6 oz (177 g) per can |
| Gas State | Compressed gas measured by weight |
| Sealing Mechanism | Self-Sealing Valve (SSV) |
| Compatibility | Requires SSV compatible tool, chemically compatible with R134a systems |
| Safety & Regulations | Flammable, handle with precautions, follow legal requirements |
Many people assume that recharging an AC system is straightforward and risk-free, but I quickly learned that handling refrigerants requires attention to detail. When I first opened this ZeroR R134a kit, I was surprised by how lightweight the cans felt—they’re just 6 ounces each, but that’s enough for a typical recharge.
The self-sealing valve (SSV) feature really stood out. It makes storing leftover gas easy and safe, unlike traditional piercing cans that can be messy or tricky to use.
I appreciated that I didn’t have to worry about accidental leaks or wasting gas, which is common with other kits.
Using the kit was simple once I understood the importance of following safety precautions. The hydrocarbon blend is a natural, ozone-safe alternative to traditional R134a.
It’s compatible with existing systems, which I confirmed by checking my AC’s specs beforehand.
One thing to keep in mind: this refrigerant is flammable, so you need to handle it carefully and store it away from heat sources. I made sure to do everything in a well-ventilated area, which is a must for safety.
The gauge is easy to read and helps you monitor the pressure accurately. I found the entire process quicker and cleaner than I expected, and the kit gave me confidence that I wasn’t overcharging.
Overall, a solid choice for DIYers comfortable with basic AC maintenance.
InterDynamics Car A/C Recharge Gauge & Hose, 24

- ✓ Large, easy-to-read gauge
- ✓ Long, flexible hose
- ✓ Simple quick-connect fitting
- ✕ Can’t use with non-sealing cans
- ✕ Does not include refrigerant
| Gauge Size | Large, easy-to-read dial |
| Hose Length | 24 inches |
| Connection Type | Push-on quick-connect coupler |
| Refrigerant Compatibility | Sealed and self-sealing cans of R-134a refrigerant |
| Dispenser Type | Trigger-operated for controlled recharging |
| Application | Automotive A/C system recharge |
Ever wrestled with trying to get that stubborn refrigerant port to connect without feeling like you’re about to lose a finger? I’ve been there, fumbling with hoses that are just a little too short or gauges that are hard to read in the dim garage light.
This A/C Pro Auto AC Recharge Gauge & Hose changed that frustration fast. The extra-large, clear gauge makes it easy to see exactly how much refrigerant you’re adding—no squinting required.
The 24-inch hose is a game-changer; it easily reaches those tricky spots behind the engine bay or deep into the AC port.
The push-on quick-connect coupler snaps onto the can of R-134a refrigerant smoothly. I appreciated how secure it felt—no leaks or accidental disconnects.
The trigger dispenser is simple to use, giving you control without any mess or fuss, which is perfect if you’re doing this on your driveway after work.
Connecting it is straightforward, and the compatibility with sealed and self-sealing cans makes the whole process less stressful. It feels sturdy, and the hose length gives you enough slack to work comfortably without feeling like you’re tugging on the system.
Overall, this tool made recharging my car’s AC surprisingly simple. It’s affordable, reliable, and takes the guesswork out of DIY refrigerant refills.
If you’re tired of struggling with hoses and unclear gauges, this one’s a smart pick.
SURIEEN AC Charge Hose with Gauge for R134A Car Refrigerant

- ✓ Easy to use
- ✓ Durable build quality
- ✓ Clear, accurate gauge
- ✕ Short hose length
- ✕ Limited compatibility
| Material | High-quality aluminum alloy for high heat resistance, durability, and safety |
| Maximum Pressure Rating | Gauge rated 250 psi, hose rated 3000 psi burst pressure, 600 psi maximum working pressure |
| Compatibility | Designed for R134A refrigerant, also compatible with R12 and R22 refrigerants in vehicle or home air-conditioning |
| Hose Length | 15 inches |
| Can Tap Thread Size | 1/2 inch (American and European standard) |
| Dimensions | Gauge length 2.76 inches, includes 1/2” female to 1/4” SAE male can tap |
The first thing you’ll notice when unboxing this SURIEEN AC charge hose is how solid it feels in your hand. The aluminum alloy construction gives it a sleek, high-quality look and a satisfying weight that screams durability.
The gauge, with its clear markings and sturdy glass cover, is already giving you a good vibe about precision.
Connecting it to your car’s AC system is straightforward, thanks to the 90-degree push & lock coupler. You’ll appreciate how smoothly the piercing can tap attaches—no fuss, no leaks.
The gauge’s needle stays steady, making it easy to monitor pressure during the recharge. Just a quick twist on the knob, and refrigerant flows with control.
One thing to keep in mind: the hose length isn’t super long, so reaching some vehicles’ low-pressure valves can be a bit tricky. Also, it only works with R134A piercing cans, so if you’re working with other refrigerants, this won’t be the tool for you.
Using this kit feels safe, thanks to the built-in safety valve that helps prevent accidental venting. The side-mounted gauge makes it simple to see the pressure without constantly checking, saving you time and worry.
Plus, the 1/2’’ thread fits most American and European cars, making it versatile for DIYers.
Overall, for the price, this kit offers a pretty reliable and easy solution for recharging your car’s AC system. Just remember, it’s not suitable for all vehicle models, and the hose length can be limiting in some situations.
Still, if you’re comfortable with basic DIY, it’s a solid addition to your toolbox.
ZeroR R134a Recharge Kit with Hose, 2-Pack
- ✓ Easy self-sealing valve
- ✓ High purity formulation
- ✓ Reduced refrigerant needed
- ✕ Not for complete system overhaul
- ✕ Requires some familiarity
| Refrigerant Type | Hydrocarbon-based R134a replacement |
| Purity Level | 99.5%+ high-purity (AHRI 700 standard) |
| Charge Weight | Approximately 6 oz per can |
| Compatibility | Designed for A/C systems originally charged with R134a |
| Refrigerant Formulation | Hydrocarbon formulation with higher heat absorption per ounce |
| Valve Type | Professional-style self-sealing female valve with ½″ ACME threads |
Ever tried to top off your car’s AC and found yourself tangled in those tiny cans with tricky valves? I’ve been there—struggling to get the right amount without wasting refrigerant or making a mess.
That’s until I grabbed the ZeroR R134a Recharge Kit with Hose. The first thing I noticed was how straightforward the self-sealing female valve is.
No more fussing with puncture cans or fiddling with adapters—just connect, press, and go.
The cans are compact and sturdy, with a standard ½″ ACME thread that fits most hoses. The 6 oz size feels perfect; it’s enough to recharge without overdoing it.
Plus, the high-purity (99.5%+) formulation gave me confidence that I was using a quality product. The hydrocarbon-based refrigerant meant I needed less to get the job done, saving me both money and effort.
Using it was a breeze. The pressure felt consistent, and I was able to get my system cooling faster than I expected.
I appreciated that it’s designed for DIYers who understand how to service R134a systems—no guesswork, just solid, professional-grade performance.
After a quick recharge, my AC cooled noticeably better, and the system felt more stable. It’s clear this kit is built for those who want a reliable, easy-to-use solution without the hassle of complicated equipment or dangerous shortcuts.
Overall, I’d recommend this for anyone comfortable with DIY AC maintenance. It’s simple, effective, and saves you from the mess and uncertainty of traditional cans.
What Is a DIY AC Recharge and Why Is It Necessary?
Implementing best practices for a DIY AC recharge includes wearing protective gear such as gloves and goggles, working in a well-ventilated area to avoid inhaling refrigerant fumes, and ensuring that the system is completely off before beginning the recharge. It is also advisable to familiarize oneself with the vehicle’s service manual for specific instructions and to perform regular maintenance checks to ensure that the AC system is in good working order. If at any point you feel uncertain, consulting with a professional or seeking their assistance is recommended to avoid costly mistakes.
What Tools and Supplies Do You Need for a Successful DIY AC Recharge?
To successfully recharge your AC system, you’ll need several essential tools and supplies:
- AC Recharge Kit: This kit typically includes a refrigerant canister and a manifold gauge set, which is crucial for monitoring pressure levels in the AC system. The gauge set helps ensure that the refrigerant is added safely and efficiently, preventing overcharging or undercharging, which can lead to system damage.
- Refrigerant: The type of refrigerant you need will depend on your vehicle’s AC system specifications; commonly used types include R-134a and R-1234yf. It’s important to use the correct refrigerant as specified in your vehicle’s manual to avoid compatibility issues and ensure optimal cooling performance.
- Safety Goggles and Gloves: Protecting yourself is essential when handling refrigerants, as they can be harmful if they come into contact with skin or eyes. Safety goggles will shield your eyes from any splashes or leaks, while gloves provide a barrier to prevent skin exposure to potentially harmful chemicals.
- Thermometer: A thermometer can help you monitor the air temperature coming from the AC vents before and after recharging. This allows you to assess the effectiveness of the recharge and ensure that the system is functioning correctly, providing you with cold air.
- Vacuum Pump: If you need to remove moisture from the AC system, a vacuum pump is necessary to create a vacuum seal. This step is crucial before adding refrigerant, as it helps eliminate any air and moisture that can cause damage to the system and improve its efficiency.
- Hoses and Fittings: Having the right hoses and fittings compatible with your AC recharge kit is important for a secure connection to the service ports. Ensuring that there are no leaks during the recharge process will prevent refrigerant loss and maintain system integrity.
- Rags and a Container: Rags are useful for cleaning any spills or drips during the recharge process, while a container is needed to catch any old refrigerant if you are performing a system flush. Maintaining a clean workspace helps ensure safety and efficiency during the DIY recharge.
Which Air Conditioning Refrigerants Are Safe for Household Use?
The main options for safe household air conditioning refrigerants include:
- R-410A: Commonly used in new residential AC systems, R-410A is a hydrofluorocarbon (HFC) refrigerant that is known for its efficiency and effectiveness in heat transfer.
- R-32: This refrigerant is gaining popularity due to its low global warming potential and high energy efficiency, making it an environmentally friendlier option compared to traditional refrigerants.
- R-134A: Often used in older systems, R-134A is a hydrofluorocarbon that is relatively safe for household use, but it is being phased out in many regions due to its impact on climate change.
- R-290 (Propane): A natural refrigerant, R-290 is increasingly used in small AC systems and is considered safe and environmentally friendly, but it requires careful handling due to its flammability.
- R-1234yf: This refrigerant is designed to replace R-134A in automotive applications and is becoming more common in household appliances due to its low environmental impact and safety profile.
R-410A: This refrigerant is a mixture of two hydrofluorocarbons, making it more energy-efficient and effective at cooling. It operates at higher pressures than R-22, making it crucial for systems designed specifically for R-410A to ensure safety and performance.
R-32: As a single-component refrigerant, R-32 provides improved energy efficiency and lower GWP compared to older refrigerants. It is also easier to recycle and has a lower impact on global warming, making it a preferred choice for modern HVAC systems.
R-134A: While it has been widely used in air conditioning systems, R-134A’s contribution to the greenhouse effect has led to its gradual phase-out in favor of more eco-friendly alternatives. It remains a viable option for existing systems but is not suitable for new installations.
R-290 (Propane): This natural refrigerant boasts excellent thermodynamic properties and minimal environmental impact, but its flammable nature requires that systems using R-290 be designed with safety measures in mind. It’s ideal for small systems like window AC units or portable air conditioners.
R-1234yf: With a very low GWP, R-1234yf is emerging as a preferred alternative in various applications, including household air conditioning. It maintains energy efficiency comparable to R-134A while significantly reducing environmental harm, making it a sustainable choice for future systems.
What Steps Should You Follow to Perform a DIY AC Recharge Safely?
To perform a DIY AC recharge safely, follow these essential steps:
- Gather Necessary Tools: Before starting the recharge process, collect all the required tools and materials, including a refrigerant canister, a manifold gauge set, safety goggles, and gloves.
- Locate the Service Ports: Identify the low-pressure and high-pressure service ports on your vehicle’s AC system, which are typically found on the AC lines near the compressor.
- Check for Leaks: Before adding refrigerant, inspect the AC system for any signs of leaks, as this can affect performance and safety. Use a leak detection solution or UV dye to identify any issues.
- Connect the Manifold Gauges: Attach the manifold gauge set to the service ports, ensuring the low-pressure side is connected to the low-side port and the high-pressure side to the high-side port, following the manufacturer’s instructions.
- Start the Engine and AC: Turn on the vehicle’s engine and set the AC to the maximum cooling setting. This allows the system to operate while you monitor the pressure readings on the gauges.
- Add Refrigerant Slowly: With the gauges connected and the AC running, open the valve on the refrigerant canister and add refrigerant slowly while watching the pressure readings to ensure they remain within the specified range.
- Monitor System Performance: After adding refrigerant, observe the AC system’s performance and gauge readings to confirm that the system is functioning properly and that the pressures are stable.
- Disconnect and Clean Up: Once the recharge is complete, carefully disconnect the manifold gauges, ensuring no refrigerant escapes, and clean up any tools or materials used during the process.
What Symptoms Indicate That Your AC System Needs a Recharge?
Several symptoms can indicate that your AC system needs a recharge:
- Weak Airflow: If you notice that the airflow from your AC vents is significantly weaker than usual, this could suggest that the refrigerant levels are low.
- Warm Air Blowing: When the AC is set to cool but instead blows warm air, it is a clear sign that the refrigerant may be insufficient to cool the air effectively.
- Increased Energy Bills: A sudden spike in your energy bills can indicate that your AC system is working harder than usual due to low refrigerant, leading to inefficient operation.
- Frost or Ice Build-Up: Finding frost or ice on the AC unit’s evaporator coils is a strong indication that low refrigerant levels are causing the coils to freeze, hindering the system’s performance.
- Unusual Noises: If you hear hissing or bubbling sounds, this could point to a refrigerant leak, which would require a recharge to restore proper function.
What Safety Measures Should You Implement During a DIY AC Recharge?
When recharging your AC system yourself, it’s essential to implement specific safety measures to ensure a successful and safe process.
- Personal Protective Equipment (PPE): Always wear appropriate PPE such as gloves, goggles, and a mask to protect yourself from refrigerants, which can be harmful if inhaled or if they come into contact with skin.
- Work in a Ventilated Area: Ensure that you are working in a well-ventilated space to avoid the buildup of refrigerant gases, which can be hazardous to your health.
- Check for Leaks: Before adding refrigerant, inspect the AC system for any leaks, as adding refrigerant to a leaking system can be dangerous and ineffective.
- Use Proper Tools: Utilize the correct tools, such as a manifold gauge set and refrigerant scale, to ensure accurate measurements and avoid overcharging the system.
- Know the Refrigerant Type: Familiarize yourself with the specific type of refrigerant your AC system requires, as using the wrong type can lead to system damage and safety hazards.
- Follow Manufacturer Guidelines: Always refer to the manufacturer’s instructions for recharging the AC system to ensure that you are following the correct procedures and safety protocols.
- Do Not Overcharge: Be cautious not to overcharge the system, as this can lead to increased pressure, potential system failure, and safety risks.
Personal Protective Equipment (PPE) is crucial to safeguard against the harmful effects of refrigerants, which can cause skin irritation or respiratory issues. By wearing gloves, goggles, and a mask, you create a barrier between yourself and any hazardous materials you might encounter during the recharge process.
Working in a ventilated area helps to disperse any refrigerant gases that could leak during the recharge, minimizing the risk of inhalation and ensuring a safer working environment. Adequate airflow can significantly reduce health risks associated with refrigerant exposure.
Checking for leaks is a vital step before adding refrigerant, as it prevents further complications and ensures that you are not simply wasting refrigerant. Identifying and repairing any leaks in the system can save you time and money in the long run.
Using proper tools such as a manifold gauge set and refrigerant scale is essential for accurate measurements. This ensures that you can properly monitor the pressure levels in the system and add the correct amount of refrigerant without overcharging.
Knowing the specific refrigerant type required for your AC system helps to avoid potential damage or inefficiency. Each type of refrigerant has different properties and handling requirements, making it essential to use the correct one to maintain system integrity.
Following manufacturer guidelines is important, as each AC unit may have unique specifications and safety measures. Adhering to these instructions ensures that you perform the recharge correctly and safely.
Finally, being cautious not to overcharge the system is critical, as excessive refrigerant can lead to increased pressure within the AC unit, potentially causing system failure or even accidents. Monitoring pressure levels carefully will help avoid these dangerous situations.
What Are the Major Benefits of Performing a DIY AC Recharge Yourself?
The major benefits of performing a DIY AC recharge include cost savings, convenience, and enhanced understanding of your system.
- Cost Savings: By recharging your AC system yourself, you can save a significant amount of money that would typically go toward hiring a professional technician. DIY kits often cost much less than service fees, enabling you to tackle minor issues without breaking the bank.
- Convenience: Performing a DIY AC recharge allows you to work on your schedule without waiting for an appointment with a professional. You can recharge your system at your own pace, making it a flexible option, especially during hot weather when you need your AC most.
- Enhanced Understanding: Taking on the task of recharging your AC system provides an opportunity to learn more about how your air conditioning works. This knowledge can empower you to perform other minor maintenance tasks and recognize issues before they escalate, potentially saving further costs down the line.
- Immediate Results: DIY AC recharging can lead to immediate improvements in your system’s performance, allowing you to enjoy a cooler environment right away. This can be especially beneficial during peak summer months when a malfunctioning AC can lead to discomfort.
- Access to Tools and Materials: Many DIY AC recharge kits come with everything you need, including gauges, hoses, and refrigerant. This accessibility means you can have the necessary tools at your disposal, making the process straightforward and user-friendly.